Welcome to a work in progress

This blog is dedicated to the restoration and modification of a Glasflügel Standard Libelle H201B, and a tribute to those who have dared to do the same, and to those who are helping with seeing this dream take flight.

Wednesday, September 25, 2013

Update Status - The Trailer

Just a quick update

OMG! The tailer top and wheel covers are finally painted!

The complete story to follow!

I had to mention this since the full story is still in the writing!

Tuesday, August 20, 2013

The Trailer! Part 11 - Bob that top! and change that jack!

Well here we are, again, back to redesigning the trailer. I knew there was some guess work on figuring out how much height was needed to the top to clear the wing root fairings. After the fairings were installed on the glider, and when Robert needed me to pack it back up into the trailer, I found that the top of the trailer was almost 10 inches higher than it needed to be. and when it comes time to mount sway stops for the wings on the top of the trailer, they would need to be long ones. Also, during the loading of the glider, the tongue jack will not raise the trailer high enough to allow the tailgate to drop low enough for the ramp to work.


So, I needed to cut the top down, and get a new Jockey wheel

So here we are again. With the trailer home, I remeasured the trailer top and cut the top off and shortened the side.  
 ...... and of course, as soon as I started the work... boom, boom, boom, the summer storms start there daily roll in, starting at noon till dusk!

Here is the new profile of the trailer.

Joseph has also been involved in securing the fiberglass top to the sides!... He has been a big help with getting this down between rain drops! 


With this new profile, the forward steel hoops needed to be re welded, ...


 and while we are doing that, lets get rid of the old Jockey wheel,


and replace it with a real adjustable one!


I also found adjustable stabilizer struts for the front and the rear of the trailer to stop the trailer from twisting when the top is up! 

Here are the front struts,.... 
And the rear struts.

 
I was able to cut the forward access hatch down to fit and located a locking T-handle that secures it.

And NAPA had a weatherstrip that fit perfectly in the opening!


So, off to Roberts for some welding lessons, and a remake of the fuselage ramp with a folding tailwheel track, and is adjustable! A far sight better than the original!

Starting to look promising!  

We are just about ready to paint the insides and I can then install the wiring.

What I find sick is, I've spent more time and money on this damn trailer than on the glider.
I'm told that we might be able to bring the glider back to the shop in a couple of weeks to continue the work!


Wednesday, July 24, 2013

The Trailer! Part 10 - Damn that cradle!

Back last fall, I loaded the trailer with the glider after two years, and I found that after I corrected the cradle, it was just a bit too wide and the wings were resting too close to the sides of it.. Also, I found out the all of that expensive welding to modify the frame for the cradle was totally unnecessary.

Robert showed me how to make cart trucks for the cradle, which lowered the storage profile of the glider in the trailer. This was a design used back in the day, and today, with the all metal cradles.


Here is a sample of the simple caster wheel cradle truck.

....  verses my over worked metal one.


This design might correct the problem of the short nosecone holder that was screwed up when the frame was shortened against my instruction by the welder.

After a bit of rework to the cradle, here is the finished product!

 New caster wheels,


 ......   shortened sides, plenty of room on the side to keep the wings from hitting them.


Let's compare .


........ the old style


........and the new style ...


I know that I will be discarding the original rail, which will need to be refabricated to accommodate the narrow wheel base. But I also found that I needed to get the glider further out of the trailer.

Why is it that I get help after I did the work?

I hope those reading this are learning from my mistakes!  ;-)

This could save you from wasting a lot of time and money..


So!,... what's next... Oh yeah, time to bob the top of the trailer.


The Trailer! Part 9 - Those pesky mid-wing supports!

Like a bad penny, I just cannot get this trailer thing done and done right.... the first time.

With the trailer back home, I was able to work on replacing the mid wing supports.

The original supports were nasty.
The fiberglass had holes drilled in them for no reason.


The carpet padding was cruddy. 
I tried to cleanup the old ones, but the carpet could not be separated from the glass.


So I made a pattern from foam, and made replacements wing supports.

The foam was covered with foil tape, 
waxed, and then glassed up.


After the glass layers were finished, I mounted matching new caster wheel hardware.
I cleaned up the shape, and prepped it for painting and new carpet padding.


After I painted the supports with DCC Red paint, I glued the carpet in and trimmed off the excess.

They are now being used on the wings.


Back to another modification..... the fuselage cradle.


Tuesday, July 23, 2013

Home again, home again, jiggity jig!

What's wrong with this picture! My home is looking like a glider repair station!

So, for the last month, the glider is back home, pending a break in the work schedule at the airport so mine can get back on  to be completed.

While the trailer has been sitting here, I decided to continue with the trailer work based on some issues I discovered since the glide has been able to be stored in it again.

The first problem discovered was when we tried loading the glider back in the trailer. The tongue Jockey wheel jack cannot be adjusted to lower the tail of the trailer. I bought a Jockey wheel from the UK and get the old one off. This turned out to be a waste of money with all of the welding and placing and replacing of this part.

Next, After the fairings were finally mated to the plane, I found the the trailer top was about 8 inches higher than I needed to be. Due to the extreme height issue, making wing supports for the top would end up being too long. Screw it, I will just cut the top down to lower the profile.

I know they will be a need to re-weld the steel hoops, more waste, more expense... Jeez!

So, stay tuned for more of my loony tunes!

BTW.

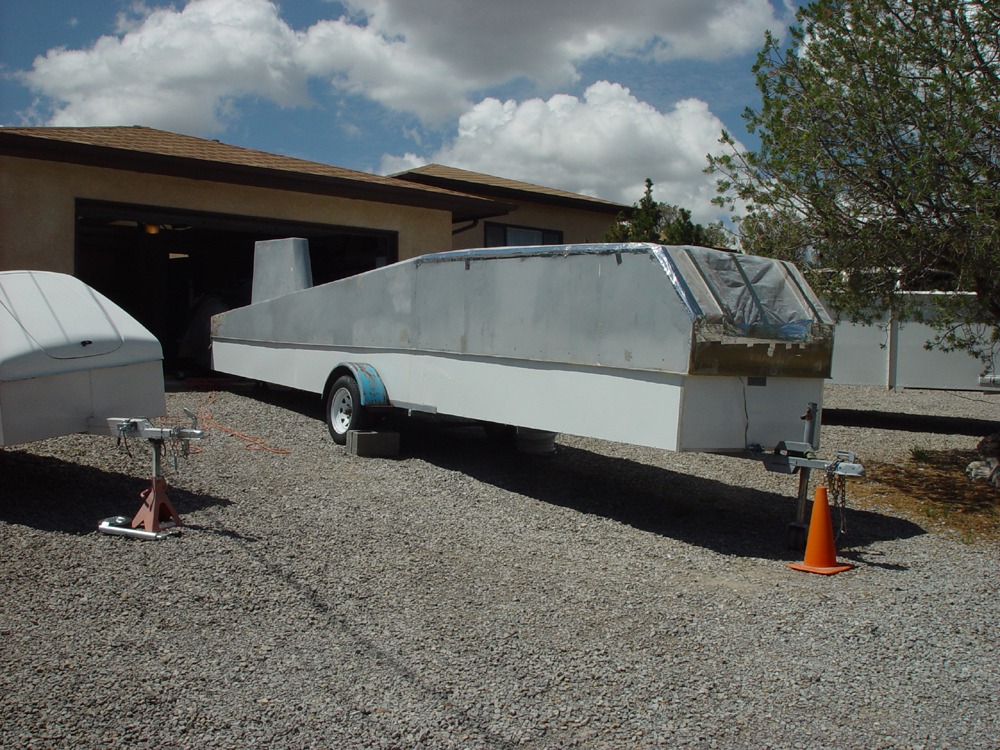
The trailer on the left is a broken PIK-20B project I bought. The trailer is a prototype, but better than the other one. The only down side is that it is really low for the profile of the PIK. The trailer on the right (hidden in the tree) is Roberts PIK-20B that I will be using to make molds for to repair mine

Damn, I'm one sick puppy!

Thursday, June 13, 2013

Finishing update

Well, the final finishing on the glider has taken a side line turn-around.

Upon Robert's return from Europe, he stated that he has a number of Gliders that will be coming in for service, and a rep from Slovenia will be arriving to help over-see the repairs. This means that he will need the shop for all of these planes.

So, last week, we loaded up the sailplane in the trailer, and Wednesday, I brought it back home.

I was not expecting the glider to be back home so soon without being finished.

To my surprise, Joseph came up to me last Saturday, and stated that he does not want this project to flounder. He asked me if I had room in the garage to work on the wings! The answer, if not, I'll make room!

The garage is now being readied to work on the wings! I hope we will be working on them next week!

Thank you Joseph for you enthusiasm, your fine eye for detail and dedicated work ethic!

Wednesday, May 22, 2013

Many first! - a white glider again?

First time in the paint booth, First round of painting, and first time this glider was painted whited in over 3 years!


Last weekend, Joseph and I worked many long hours prepping the glider for priming. On Friday he did a pre-primed with Feather-fill and we spent two days sanding to end up with this!

We still have issues with the high spots on the old tail break repair.

It looks like the tail was not quite straight during the repair. But it looks OK, and I can live with it.

By 8pm Sunday. We started to cover this old bird with fresh white primer!
By 9pm, she was white again!
Joseph was having some issues with the air supply during painting, which created a few slight sags in the paint (not a problem).
The sling method for the most part worked, thou Joseph was having reach problems applying the primer on the belly.
But, he was able to finish without too much of a problem. 


So, what is next...

Robert has returned from his trip in Europe, and I'm sure he will have Joseph tied up.
I will have to work out a payment plan for the work that has been done, and with my wife out of work because of a back injury, all of my project funds have been used to keep a roof over our heads since my pay is used up.

Final paint will have to wait. 

Looks like this project is on hold again!

Sucks!