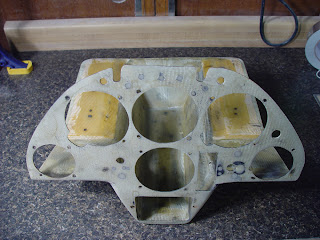
As you might recall, the instrument panel face and tray......


And they were so riddled with holes, they looked like Swiss Cheese.

And no, this tray is not made of carbon fiber, it's black paint!
There was so much over-spray, it also covered the original radio case

I removed the old flat black paint from the panel, only to reveal more holes.
This new development could change my original plans of just filling in the old instrument openings and screw holes.
After showing Robert the condition of the panel, he stated that it would be better if we just totally replace the face.
Before any of the work got started, Robert suggested that I find the level line on the panel so we have an alignment reference for the instruments when we are ready to mount them.
I had just finished sealing up the holes that were in the top guides. Next, patch the holes in the tray sides and back.
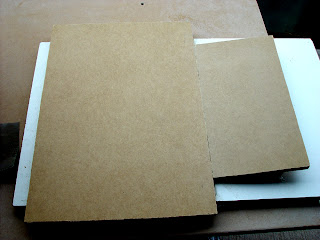
Now came the task of making the flat plate mold for the front panel.
I used old counter top material that was not scratched up or porous.
I used old counter top material that was not scratched up or porous.
I added weight to the panel to hold the tray, while I positioned the the plate to hold the correct angle.
I used hot glue to tack the wooden plated at the correct angle, then applied glue to create a better bond.
When the glue dried, I inspected the plate surface for imperfections, and used 1000 grit wet-dry paper to prep the surface for the release agent.
In order to prevent the angle of the mold from changing the shape from filling and sanding, I just used a wax mold release agent as a filler. I applied this liberally in the groove and on the surface.
I then rubbed the wax into the surface. I applied three coats.

I rubbed the wax into the surface between coats, until I could no longer see any surface blemishes.
To create the panel front, I used a sandwich of Peel Ply nylon first, followed by a single layer of E-120 glass, then four layers of 7725 glass, then another layer of E-120 and then covered with the Peel Ply.
To ensure that there were no bubbles in the resin and fiberglass between each layer, I squeegeed the excess resin out.
I used the lead weights from the ballast bags that were once mounted in the nose of my glider. I knew I would find another use for them.
With the panel weighted and secured, the next step was to create a means to position the panel tray with the angled surface once the old panel was removed.
With the panel weighted and secured, the next step was to create a means to position the panel tray with the angled surface once the old panel was removed.
Then last, I drew a pencil outline of the panel face on the Peel Ply surface.
I drew another pencil outline of the area on the fiberglass I needed to expose to cement the tray in place. I then carefully cut the Peel Ply nylon away from the surface finish of the new panel.
 Here is the point of no return! I had to carefully cut the old panel away from the tray, while leaving the slight curve along the edge.
Talk about feeling uncomfortable about doing this and praying that you don't screw it up!
After a few test fittings, I knew I was ready to cement the tray to the new panel fiberglass.
I used two layers of the 7725 fiberglass cut in even strips. I applied the glass wet, and place a layer of the Peel Ply nylon over the strips before I squeegeed out the excess resin.
After the resin cured, I cut away the excess fiberglass leaving about an inch over the outline edge of the drawn patten from the original panel.
I then removed the wooded blocks.
Before doing the final clean up shaping cuts, I applied a light coat of resin along the inside edge to ensure that the bond was strong.
After the resin was cured, I cut away the excess resin and cleaned up the edges
The panel was ready for the first fitting in the cockpit.
I kept the parts from the original panel to verify the correct size and shape of the screw holes and latch guide notches.
With the new holes drilled out, I could see that the panel was properly aligned.


Thank you , John
ReplyDeleteThis was very helpful...Thank you
Ross
s/n 159