Now that I have the parts cleaned off of the old paint and the corrosion removed, they're ready to be restored.
I created a hanging paint booth in my garage by draping plastic drop sheets. I also hung a one-inch wide dowel rod from the ceiling to use for hanging the parts to dry.
(The following photos of the painted parts were accomplished over a period of 30 days.)
I created a hanging paint booth in my garage by draping plastic drop sheets. I also hung a one-inch wide dowel rod from the ceiling to use for hanging the parts to dry.
(The following photos of the painted parts were accomplished over a period of 30 days.)

Here is a photo of the booth with some parts that were finished.
After the parts were cleaned, I wiped them of again with acetone before shooting them with Green Zinc Chromate. After the chromate dried, I shot a Smoke Gray enamel paint over the parts. I applied three coats.
I continued the process of cleaning, priming, and painting the parts.

Here are a sample of the repainted parts:
Landing gear actuator arm
and Aileron linkages.
Rudder Linkages
Tow release linkageLanding gear actuator arm
and Aileron linkages.

Aileron Rods
Landing gear rods and linkage
Elevator actuator arm and stick linage

Rudder armature and supports

Aileron linkage

If you remember from the previous post, I mentioned the condition of the rudder pedal adjustment mechanism and the control stick. One part I forgot to mention was the canopy latch, and I wish I took photos of the condition of it before the cleanup process. 
Here is a photo of the Aileron actuator shaft after is was overhauled and painted by Streifeneder. If you look closely at the welded attachments, you can see the added strapping per the TN.
Providing that this part is inspected during the aircraft's annual, this is an optional modification. After talking with Robert Mudd, who is an AP IA, I would highly recommend having this part to be overhauled!
I had difficulty disassembling the latch due to the amount of corrosion. I discussed with Robert on the process of removing the latch from the frame. The axle pin was extremely corroded, and is molded into the canopy frame.

To remove the latch, a grove need to be ground out of the frame on both sides of the latch, just enough to expose the ends of the axle pin.
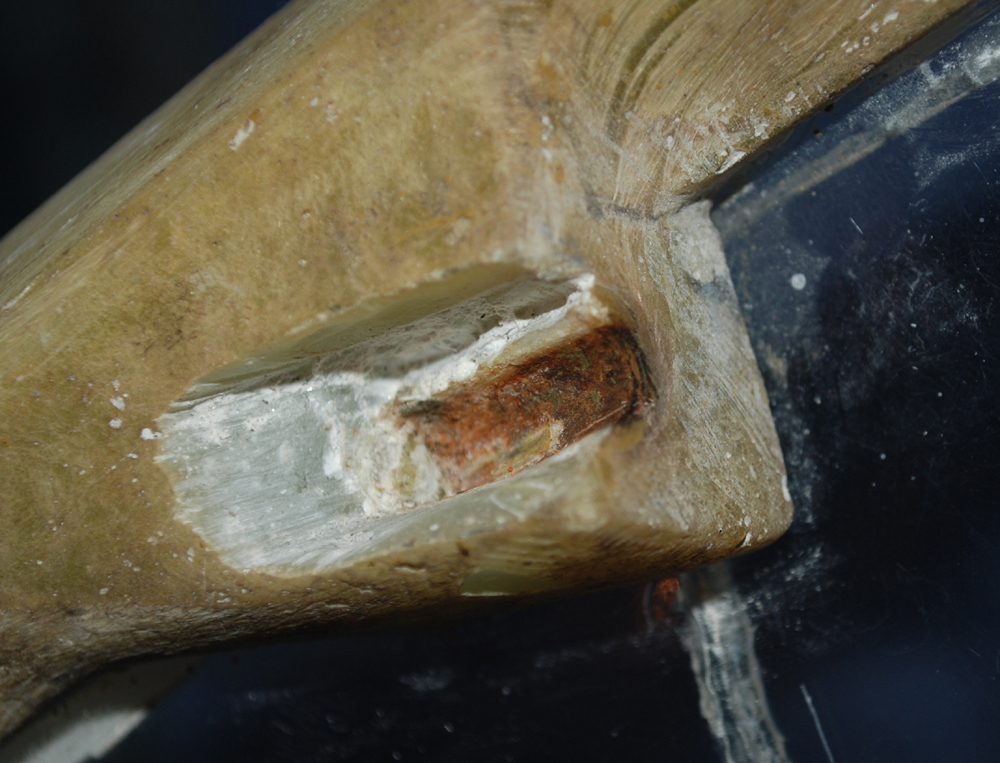
As you can see from this closeup photo of the notch in the frame, the rust color corrosion from the axle.
This rust was both sides, and deep in the shaft of the latch.
Robert removed three very fine pins that held the retaining lugs to the shaft brace, and the locking knob to the locking pin shaft. This was as far as we could disassemble the latch.
I used a combination of penetrating oil, and solvents to remove the corrosion. Using a series of fine wire brushes and an emery cloth, I was able to polish the metal parts back to the original metal finish.
Using the same process to prime and repaint the other parts, I followed the same steps to do the same with the latch, although it was tricky to do, due to all of the angles. After the paint cured for a month, I reassembled the latch.

I know that the latch is well used and will not look this nice after several uses, but at least, it is clean and free of rust and grime.
I plan on replacing the canopy, and before Robert and I work on that, I wanted to clean up the frame, and have it painted.

This photo shows the cleaned latch axle and how it will fit back into the notch before the frame is filled in and refinished.

Test fitting the latch back into the frame.

Back to the rudder pedal adjustment mechanism.
It was a mess. This is the most I could achieve on striping it down to its basic components. The slide section is welded together and in order to free it from the tube rails, I would need to break the rivets on the end caps.
I found that I could still strip and clean the slide, springs and bearings without cutting or breaking anything.

I found that I could still strip and clean the slide, springs and bearings without cutting or breaking anything.

As you can see from the photos, the slider looks as good as new!
And all of the pedal parts went back together without any problems.

The plain glass pedals looked nasty. So, I painted them too.

They look so nice with the matching gray arms,

Finishing the stick was a challenge, since I could not remove the bearings from the armature.
The stick parts are painted in both gray enamel and black epoxy. the grip is made of teak and sanded to the correct shape. A replacement green trim button was purchased from Streifeneder since the original was rusty and pitted.

The stick has been reassembled. The trim wheel is not bolted in yet since the trim adjustment rod that slides into the shaft will need to be adjusted to the correct length when the elevators are in the neutral position.

The landing gear struts have been repainted in a high gloss back epoxy paint.

And last but not least... remember the elevator horn that was chipped up and covered with white over spray? It's now restored and with a fresh coat of red paint!
Before I started working on the parts, I did a little sanding on the fuselage, rudder, and horizontal stabilizer. Now it's time to talk about this challenge, and the discoveries I made during the process!

The parts look beautiful!. It looks like you'll be reasy for the season.
ReplyDelete