Welcome to a work in progress

This blog is dedicated to the restoration and modification of a Glasflügel Standard Libelle H201B, and a tribute to those who have dared to do the same, and to those who are helping with seeing this dream take flight.

Friday, March 18, 2011

One year to the day!

Well it's been one year to the day that I first noticed the ad in the classifieds from the SSA, and the followup email to Charlie.

And what a year it has been!

I bought a glider, manage to tear it apart, spend a shit load of money on the road to restore a classic!

During this past year, I lost and gained a job, finished a semester of school successfully, and made it through one long winter.

I'm back working on removing gelcoat now that the weekend days are getting warm enough to work outdoors.

Thank you for those who have been following this blog.


Coming up in the next weeks on this blog.

New toys, New Frills, and more hard work!

Sunday, February 6, 2011

Sand and sand, and not a beach in sight! Part 2

In my last post I wrote about the work on the fuselage. But during those periods where I was getting frustrated with the progress of removing the gelcoat, I took a break from sanding the fuselage to sanding on the rudder and horizontal stabilizer.

Here is that story:

Through the month of July and August, between painting parts, and sanding the fuselage, I sanded the gelcoat off of the rudder.
 

As mentioned in a previous post, the rudder trailing edge was damaged.


The damage was caused by the fuselage rocking back and forth in the trailer, due to the tail wheel restraining bolt coming loose. The rudder was striking a end cap support in the trailer. I'm working on a solution to prevent this trailer rash from happening again.

For those who plan on doing the same in the future, 
Please take note!
You need to do a weights and measures - limits on all control surfaces before starting anything. I did not know this until after the facts. There are no documentation standards on these surfaces.


The gelcoat on these surfaces went deep in to the upper first layer of  fiberglass cloth. The downside of removing the gelcoat is, there is only a thin layer of fiberglass between the gelcoat and the balsa layer. And I do mean thin layer. That layer seamed no thicker than a human hair. Removing the gelcoat exposed the balsa core underneath.

There were layers of filler that were cracked to the balsa on the trailing edge. As I was sanding the filler away, I started to notice the balsa layer peeking through. Oops!, Too late!
The light colored areas in this photo is the now exposed balsa.

But, the rudder is done, ready to be repaired and then painted.

Working on the horizontal stabilizer was a real treat too, (I'm being sarcastic). There were chunks of gelcoat popping off of the top and bottom flared edges of the fairings.


Some of the chunks popped off when I was traveling back from picking up the glider.


Robert instructed me to remove all or the gelcoat and filler on the fairings so we can properly repair the damage.


So, I started the process of removing the gelcoat.
I also noticed that the horizontal Stab was heavier on the left side. So, out of curiosity, I tried to balance the stabilizer, but found instead, the stabilizer was off balance on the side of the repair.
As I sanded , removing the gelcoat, I notice our good friend primer covering almost the entire surface of the top skin. And as I cut through the gray, that micro bubble filler appeared. Here was the evidence on side of the stabilizer that was repaired after the hard landing back in 1977. 


There was a lot of filler used to correct the botched patch, but I was not prepared for the larger repair on the other side....


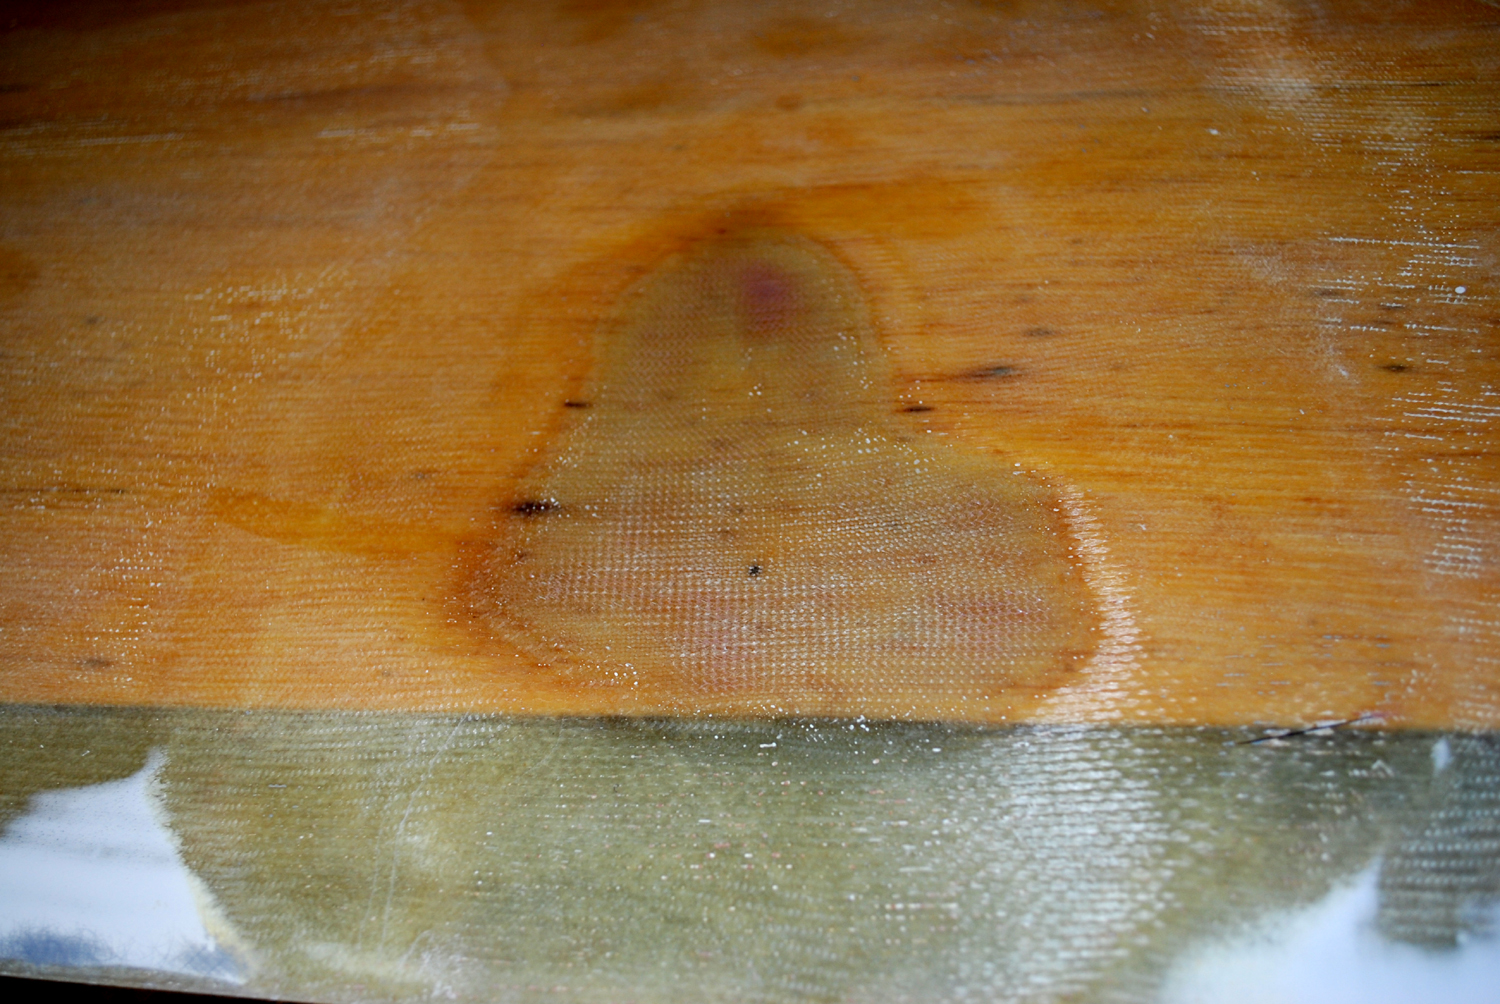
So, being a glutton for punishment, I flipped the stabilizer over and started removing the surface paint, then the gray primer, and a ton of filler, to find this mess!


This is why the stabilizer was so heavy on the left side. A side from the filler, there is a heavy coat of resin and fiberglass cloth, and what is with the balsa planks. It looked like floor planks!

I showed the stabilizer to Robert, and he stated that this could be redone, but we would need to get a copy of the lay-up schedule from Streifeneder. So, I was off to email Streifeneder for help.

Since the horizontal stabilizer is symmetrical, we will create a mold of the upper right surface to create a copy of the skin to replace this picnic table plank look-alike!  

After all is said and done, I hope the re-repair will return the stabilizer to its proper balance.

Now back to the fairing on the stabilizer.

The underlying fiberglass was in fair condition. There was a lot of gelcoat, but there were areas filled with bondo too. The Bondo popped off most of the areas that required filling, but other areas were stubborn to remove.


Fall is coming to a close, and Winter is setting in. My garage and work area are becoming too cold to work in. I have tried using electric heaters, but it is still too cold to allow me to contiue working on the horizontal stabilizer and elevators.

I will continue on some of the lesser clean up during the breaks in the cold spells.
And in closing of this post, I'm employed again!. After almost four months, I'm back to work.

Thursday, January 27, 2011

Sand and sand, and not a beach in sight!

It's now August, and still no job.
I have sending out between ten to fifteen resumes a week, reporting to the unemployment office, and going to school full time.
I have been using my saving for this project to keep our bills paid, and a roof over our heads.

This project is my only salvation to vent frustrations and keep my sanity.
To help with financially supplementing this project for materials needed to continue the restoration work, I have been selling off plastic model kits I have been collecting for over forty years.

Before I started to get into sanding the fuselage, that old coax for the antennae was really bothering me.


If you recall from an earlier post, this photo shows that the coax was replaced with a heavy ribbed one, and the old coax (White wire seen behind the copper tube) was left in the fuselage. Can we say extra weight!


I also discovered that when the new coax was installed, the person doing the work, drilled a hole straight through the fuselage side, and never repaired the damage. By the way, this hole is lined up with a second hole that the zip-tie was threaded through to hold the coax in place.


Well, I decided to put my IT networking experience to work. I'm going to replace that coax with the proper TSO'd aviation grade coax.

First, I removed the replacement ribbed coax, which wasn't difficult, since it was fished through only a couple of the original drilled holes and then tied in place with a plastic zip-tie (seen in top photo with a red circle drawn around it) in one place to then flop loosely to the antenna baluns in the vertical stabilizer.

The tricky part was removing the old original coax, which was broken off about arms length into the fuselage, and pulled into the vertical stabilizer.
I was able to fish the old coax out of about five fuselage ribs, and I was able to push the cable out of the ribs in the vertical stabilizer, but now, the cable was too far in for me to get a good hand hold to pull if free. That is why they left it in there to begin with!
So, I created an extended vise-grip with two pieces of rebar and secured them with tape and wire. I was then able to get the vise-grip to grab hold of the old coax and with a little force to pull it back within arms reach, I grabbed the cable by hand and pulled it out!

The next task was to fish a pull string through the original holes in the fuselage ribs meant to retain the antenna coax.

I have a flexible fiberglass fish tape that I used to push through each hole. I tried to use a GLO-Rod, but it was too ridged and it did not guide through the rib holes evenly.

As first, the fiberglass fish tape did not work. It was too curly and retained the coil shape like a spring. I pulled out about twenty-five feet of the fish tape and anchored it straight on the floor. Then I used a heat gun to see if I could take some of the coil shape out.

Believe it or not, it worked!


I was able to fish a nylon cord through all of the ribs. I ordered a replacement coax from Aircraft Spruce Company.

When we are ready to reassemble the control rods and actuators in the fuselage, I will be ready to pull the new coax through the fuselage!


I removed the tail wheel, and to my surprise, the damage that I could see from the outside of the tail wheel housing was actually caused by the inflator stem on the inner tube of the tail wheel.
  

The inflator stem, over time, cut a groove into the inner sidewall of the tail wheel well.

It would have taken no time at all for to have cut all the way through, and only taken one good hard drop on the tail on landing, and the tail wheel would have popped right off!


I would recommend anyone with a Libelle to periodically check the tail wheel well for this kind of damage. It could save you from some other serious landing incident!

After pulling the string for the new coax and removing the tail wheel, I'm now ready to tackle the hardest part of the restoration, sanding off the gelcoat.

Sanding off the gelcoat has been an interesting learning experience. It is quite time consuming, and I'm still not finished! I started sanding down the fuselage, but after a week or two of careful sanding with an orbital sander, I became a little antsy with the progress, there seems to be no end to the gelcoat.


I was told that the gelcoat used by Glasflügel was the toughest to remove.They were right! There is a lot, but in reality, this plane was refinished before, or should I say repainted!


After the N number was removed, I started sanding the sides. There was also a worn off area on the spine where the canopy was sliding back and forth. I focused on seeing how much gelcoat I needed tho remove before hitting the fiberglass. That's when I discovered this.


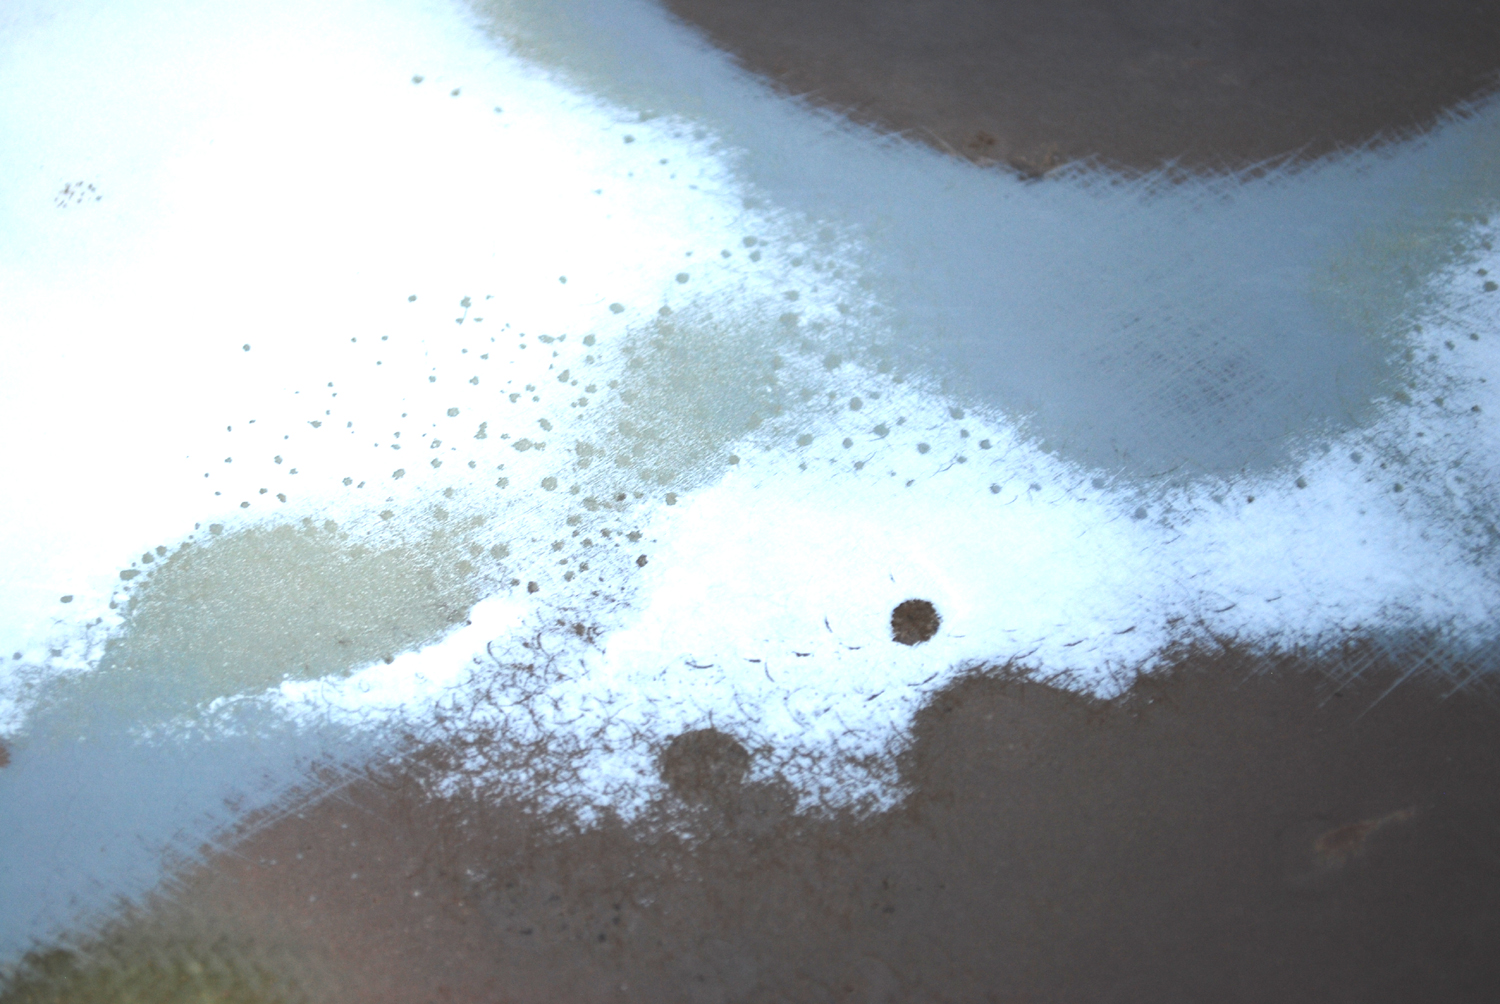
There was a coat of white paint over a coat of gray primer, over a coat of micro bubble filler, over the original gelcoat!


If you look close at this picture, you can see little circles created by the white paint that did not adhere to the primer, and filler. This is what was causing the bubbling over the entire fuselage. But wait!, there's more!


I also noticed after I exposed the under coats of paint to the air, there was grease, or oil spots that began to seep and spread over the skin. But this is nothing, it gets even better when I started sanding the nose.

I was really curious now to see the repair on the fuselage, and as I expected, it was not looking too good.

Robert Mudd still hasn't seen this work yet, and what we need to do to correct the repair, if necessary.


I continued to sand away the paint and shaking my head with amazement on how much filler material has been applied on the aft end of this glider!

That explains why the weights and balance for this glider was way off and required the lead weight in the nose.

I had to stop here, I was getting depressed.


I decided to start on the vertical stabilizer, what else could I find here?

The sanding went well. I started sanding with the orbital sander, and when I could barely see the glass peek through, I switched to 180 grit wet-dry sand paper and finished removing the gelcoat by hand.


Then, I hit more of that micro-bubble filler. There were two holes cut just below the horizontal stabilizer notch. It looks like the push rods in the tail could have been serviced, but it was not documented in the airframe log.


After whatever work was done, both sides of the tail were repaired incorrectly, leaving a large depression that was heavily filled with that micro-bubble filler.  ..... there must have been a sale on micro bubble when this glider was being worked on!


The left side was the worse. Robert instructed me to remove all of the filler, since that was the material that was causing all of the cracking of the paint to begin with.

With two large dimples in the sides of the tail, these once-filled indentations will need to be cut out and properly repaired.

This will not be the last time I'll see that micro-bubble filler.


Before I can start sanding the bottom of the fuselage, I needed to remove the landing gear doors. These were a problem to remove, there were also indication that the doors were repaired after a gear-up landing, and I'm not too surprised, this repair was not mentioned in the log book.  (The gear door repair and clean up to be addressed in a later post.)

The doors were held in place with screws and brass hinges. I had to scrape the paint and bondo off the doors and remove the screws. The screws were corroded and will need to be replaced. The holes will need to be filled and retapped when we are ready to reattach them.


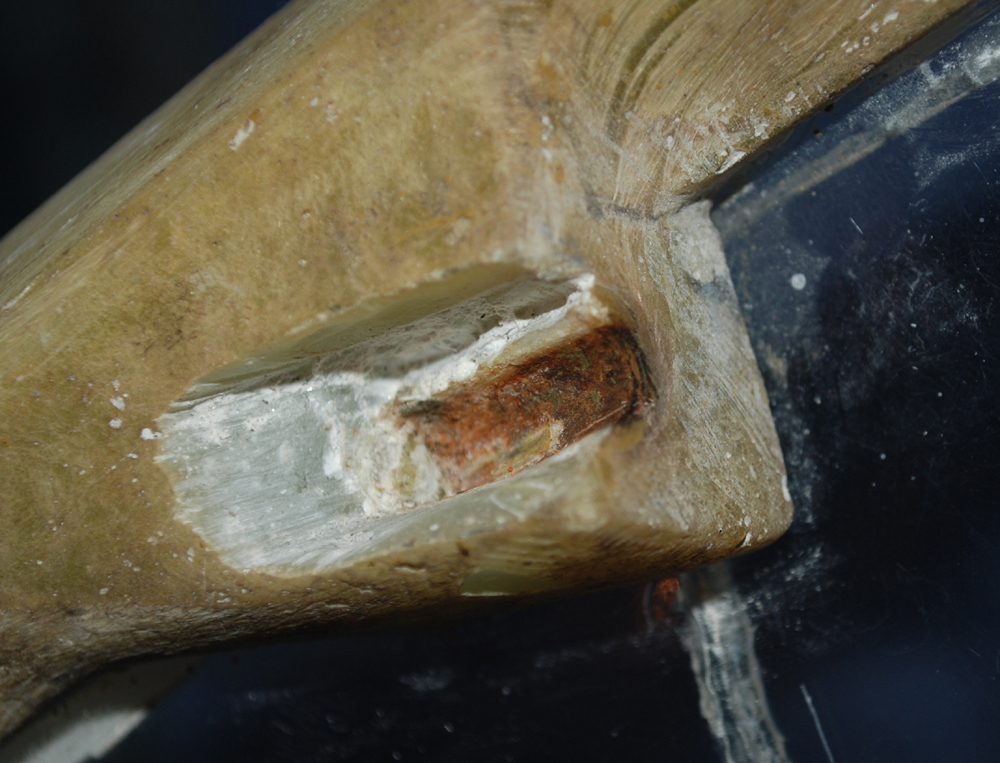
To remove the hinges from the fuselage, they needed to be cut out.


As you can see from this closeup, the rust had creeped into the slot and was deep into the fiberglass.


 As I mentioned earlier, I started sanding off the gelcoat on the nose, and after removing a ton of filler, this oily-looking crap started to seep out of the pores in the resin.


It looks like tar .. from the runway???

I used acetone to see if I could clean it out, .....


... but there seems to be no end to it!!
Robert said he wanted to look at it before we go any further with the restoration here.

It looks like they applied the fiberglass fabric over the original finish without cleaning it off!

By mid November, the temperature outside was hovering around the low sixties, and the weekends were my only time to work on the fuselage.

I finally removed most of the gelcoat before the temperature outside drop below 50 degrees during the day.


Wow!, I can't believe it's almost done! .. the fuselage, that is!


The garage is now starting to get cold, and the work outside has come to a halt.
By no means is the sanding work finished! I have the wings, ailerons, horizontal stabilizer, elevators, and rudder left to do!
Stay turned for more of the boring saga "Remove that gelcoat!"

Sunday, January 9, 2011

Now it's time to do some painting!

Now that I have the parts cleaned off of the old paint and the corrosion removed, they're ready to be restored.

I created a hanging paint booth in my garage by draping plastic drop sheets. I also hung a one-inch wide dowel rod from the ceiling to use for hanging the parts to dry.

(The following photos of the painted parts were accomplished over a period of 30 days.)


Here is a photo of the booth with some parts that were finished.


After the parts were cleaned, I wiped them of again with acetone before shooting them with Green Zinc Chromate. After the chromate dried, I shot a Smoke Gray enamel paint over the parts. I applied three coats.
I continued the process of cleaning, priming, and painting the parts.

Here are a sample of the repainted parts:


Rudder Linkages
Tow release linkage
Landing gear actuator arm
and Aileron linkages.


Aileron Rods
Landing gear rods and linkage
Elevator actuator arm and stick linage


Rudder armature and supports


Aileron linkage


Here is a photo of the Aileron actuator shaft after is was overhauled and painted by Streifeneder. If you look closely at the welded attachments, you can see the added strapping per the TN.


Providing that this part is inspected during the aircraft's annual, this is an optional modification. After talking with Robert Mudd, who is an AP IA, I would highly recommend having this part to be overhauled!

If you remember from the previous post, I mentioned the condition of the rudder pedal adjustment mechanism and the control stick. One part I forgot to mention was the canopy latch, and I wish I took photos of the condition of it before the cleanup process.

I had difficulty disassembling the latch due to the amount of corrosion. I discussed with Robert on the process of removing the latch from the frame. The axle pin was extremely corroded, and is molded into the canopy frame. 


To remove the latch, a grove need to be ground out of the frame on both sides of the latch, just enough to expose the ends of the axle pin.


As you can see from this closeup photo of the notch in the frame, the rust color corrosion from the axle.
This rust was both sides, and deep in the shaft of the latch.  


Robert removed three very fine pins that held the retaining lugs to the shaft brace, and the locking knob to the locking pin shaft. This was as far as we could disassemble the latch.

I used a combination of penetrating oil, and solvents to remove the corrosion. Using a series of fine wire brushes and an emery cloth, I was able to polish the metal parts back to the original metal finish.

Using the same process to prime and repaint the other parts, I followed the same steps to do the same with the latch, although it was tricky to do, due to all of the angles. After the paint cured for a month, I reassembled the latch.


 I know that the latch is well used and will not look this nice after several uses, but at least, it is clean and free of rust and grime.


I plan on replacing the canopy, and before Robert and I work on that, I wanted to clean up the frame, and have it painted.


 This photo shows the cleaned latch axle and how it will fit back into the notch before the frame is filled in and refinished.


 Test fitting the latch back into the frame.


Back to the rudder pedal adjustment mechanism.
It was a mess. This is the most I could achieve on striping it down to its basic components. The slide section is welded together and in order to free it from the tube rails, I would need to break the rivets on the end caps.

I found that I could still strip and clean the slide, springs and bearings without cutting or breaking anything.


As you can see from the photos, the slider looks as good as new!
And all of the pedal parts went back together without any problems.


The plain glass pedals looked nasty. So, I painted them too.


They look so nice with the matching gray arms,


Finishing the stick was a challenge, since I could not remove the bearings from the armature.

The stick parts are painted in both gray enamel and black epoxy. the grip is made of teak and sanded to the correct shape. A replacement green trim button was purchased from Streifeneder since the original was rusty and pitted.


The stick has been reassembled. The trim wheel is not bolted in yet since the trim adjustment rod that slides into the shaft will need to be adjusted to the correct length when the elevators are in the neutral position.


The landing gear struts have been repainted in a high gloss back epoxy paint.


And last but not least... remember the elevator horn that was chipped up and covered with white over spray? It's now restored and with a fresh coat of red paint!


Before I started working on the parts, I did a little sanding on the fuselage, rudder, and horizontal stabilizer. Now it's time to talk about this challenge, and the discoveries I made during the process!